Showing posts with label animatronic. Show all posts

Monday, September 5, 2011

Meet Professor Fuzzles!


Professor Fuzzles is an animatronic bunny head that looks around and sniffs.  Well, a proper bunny sniff would scrunch the nose, but instead it's moving its head a bit up and down.  Close enough!  This head will get reunited with its body once I mount everything on its display shelf.

Here's the stuffed bunny head I started with.  I liked that it had a slightly miffed-looking expression, and thought that might work nicely in the haunted house.

Disapproving bunny disapproves!

I replaced its eyes with a pair of my slightly larger toy eyes modified to glow by adding a pair of LEDs behind each eye.  I put yellow LEDs behind a pair of green eyes.

After eye replacement surgery.
I intend to power the eyes through a wall wart plugged in to a Power Switch Tail, so I can control turning them on and off from an Arduino or other microcontroller.

Here the eyes are lit.

I've given the Professor a top hat, found in a hobby store.  The head is sitting on top of a pair of standard-sized servos in a pan-and-tilt bracket assembly, mounted on a Maker Beam frame.  I'd started out using micro servos, which fit better in the head, but the gears stripped out before long.  The standard sized servos seem to be plenty tough for Professor Fuzzles' noggin.


Sunday, August 21, 2011

glowing toy eyes

So I want to give my animatronic critters glowing eyes.  I've got an eye together now that I think will serve the purpose.  It's a toy eye with two LEDs stuck between the eye and the backing piece, with cardboard wrapped in foil around the sides.


Here are the LEDs before they went around the eye.  I've soldered a 47 Ohm resistor to one leg of each of the yellow LEDs.  The foil-wrapped cardboard piece is taped to one of the LEDs here.  I'm using speaker wire to hook it all up.


The painted eye diffuses the LED light well, and the yellow light behind a turquoise-painted eye produces a nice effect.  Although not very bright, in the dark of the haunted house these eyes should show up well.

I intend to wire up a matching eye for this one, and mount them both inside a bunny head.  The bunny head I want to put on a pan-and-tilt bracket, to make it look around.

Hullabaloo, the flapping monkey


Update to the flapping monkey project:  it flaps, and it has a name, Hullabaloo.  There's still work to do to get it looking better.  The body can be arranged around the frame to hide the shoulder joints a bit better.  Also, the fabric from the head is just sitting loose on top at the moment.  I'm considering giving Hullabaloo a different head, from another animal.

Here I'm using an Arduino Mega to send commands to the SSC-32 servo controller, so it's nice to have that working.  I'll likely use the SSC-32 to run multiple toys.

Tuesday, August 16, 2011

purple flappy monkey, mostly there

Although this poor purple stuffed monkey has done nothing to deserve it, I've cut off its arms and put them on hinges.  I'm working on making its arms flap up and down.

Here is the framework for it with one flapping arm attached.


Clothespin hinge
I've hinged together the two wooden pieces of a clothespin by gluing on a small nylon hinge sold for use in model aircraft, then sewn one end into the arm, and attached the other end to the Maker Beam frame with a couple of zip ties.  The bottom of the clothespin hinge rests against a couple of screws in the frame.  At the shoulder is a control horn (also sold for use with model aircraft) which is attached to the servo horn with some fishing line.


I'm controlling it right now with an SSC-32 servo controller.


At the moment I've got the second arm attached and the base inside the monkey.  I just need to cut some holes behind the ears to accomodate the fishing line moving up and down, and get the head situated around the frame.  Then it's flappy monkey time!


Saturday, August 13, 2011

blinking cabbage patch doll


Here I've connected the eyes of a cabbage patch doll to a servo, so I can control opening and shutting her peepers.  The doll came with weighted eyes that shut when she's reclining, and open when she's upright.

I started out by cutting out a piece of the back of the head, to get acces to the eyes.  The eyes sit in molded sockets that are part of the rubber head.  I slit open the socket backs, but left them mostly intact so I could put the eyes back in them.  The eyes had a black plastic cover on the back that connects to the metal case surrounding the eye in the front.  I sliced off most of the black plastic cover with a Dremel tool, but left a ring of it to hold the works together.


To connect to the eyes, I superglued a large bent paperclip to the back of each of eye.


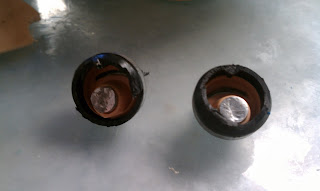
Then I mounted them back into the sockets in the head.  I cut off the ring on the base of the neck, as it was interfering with the paperclip travel.  This picture was taken through the hole cut in the back of the head.


I bent the hanging ends of the two paperclips and taped them together, so I could control them with one servo.


The servo I mounted to a base built from Maker Beam.  I attached the servo arm to the paperclips using a zip tie and some fishing line, so it could have a little play.  Here is the head with the eyes moving while sitting on the bare base.


I cut the backs of the doll's legs and pulled out a bit of the stuffing, then shoved the two beams at the bottom of the base into the legs.  I cut the doll's back and pulled out most of the stuffing in the body, then sewed it mostly back up.  I left the neck partially open to pull over the two beams at the top of the base structure.  Here is a picture from the back of the assembly.


For now, I'm using a Pololu Maestro servo controller with its software to test.  I intend to try out some others, and figure out how I want to connect together several dolls and stuffed animals for a display.

So there it is!  The eyes move slower than I might like, and also don't open and close completely, but I'm happy enough with the project as it is.

Sunday, July 31, 2011

monkeying around

Here's a simple animatronic monkey I've put together, as my first foray into fun with servos.


The baby monkey's head is mounted on a servo, so the head can turn left and right.  A Wii nunchuk hooked up to an Arduino controls the servo, using the analog joystick.  The red board is an mp3trigger, which plays monkey noises in response to button presses on the nunchuk. 

Here's a video of the thing in action:


The center for the servo seems to be off, and there's some jitter, but I was happy enough with this for a demo.  To secure the servo and baby monkey, I've sewed both to the belly of the big monkey, which serves as a sort of base.

For reading from the nunchuk, I used code from here:
http://gitorious.org/randomstuff/arduino-nunchuk

Before putting together this version with the nunchuk, I first controlled the servo with a gamepad connected to a PC that was communicating with the Arduino using serial commands.  For that, I used the excellent Python scripts from Principialabs:
http://principialabs.com/arduino-python-4-axis-servo-control/

These use pyserial and pygame.  I added some bits to use pygame on the PC for audio.  I had the idea of maybe using a ladyada Wave shield for the audio, but found its library has a timer conflict with the servo library, which is why I decided to use an mp3trigger board instead.

To use the mp3trigger board by triggering on the track pins (rather than using serial control), I've set the track pins as input pins in the Arduino setup.  Then when a button is pressed, I set the appropriate track's pin as an output, write it low, then set it back as an input.  Without leaving the pins as inputs, they'll trigger constantly, I suppose because they need to be allowed to float.

The purpose of this project was to get started with animatronics.  Next I will set up a larger doll or stuffed toy with a pan-and-tilt bracket, to play with a larger range of motion.